Here you'll find all the latest updates and improvements we've made to the platform. If you have any questions, feel free to reach out to our support team at support@pult.com
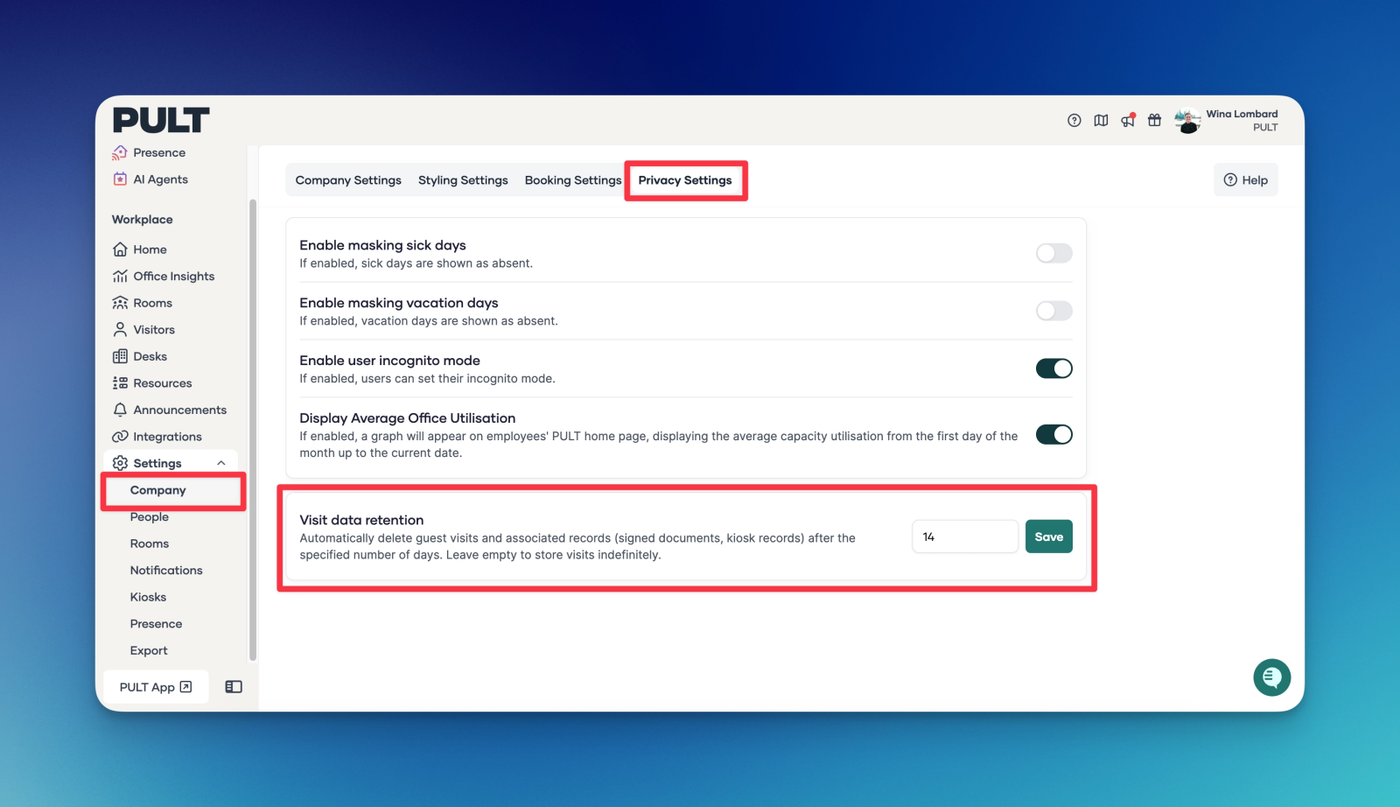
Admins can now configure how long visit data is retained under Privacy Settings in the dashboard. Set a retention period in days, after which visits — along with their associated kiosk records and signed documents — are automatically deleted. Leave it unset to keep data indefinitely.
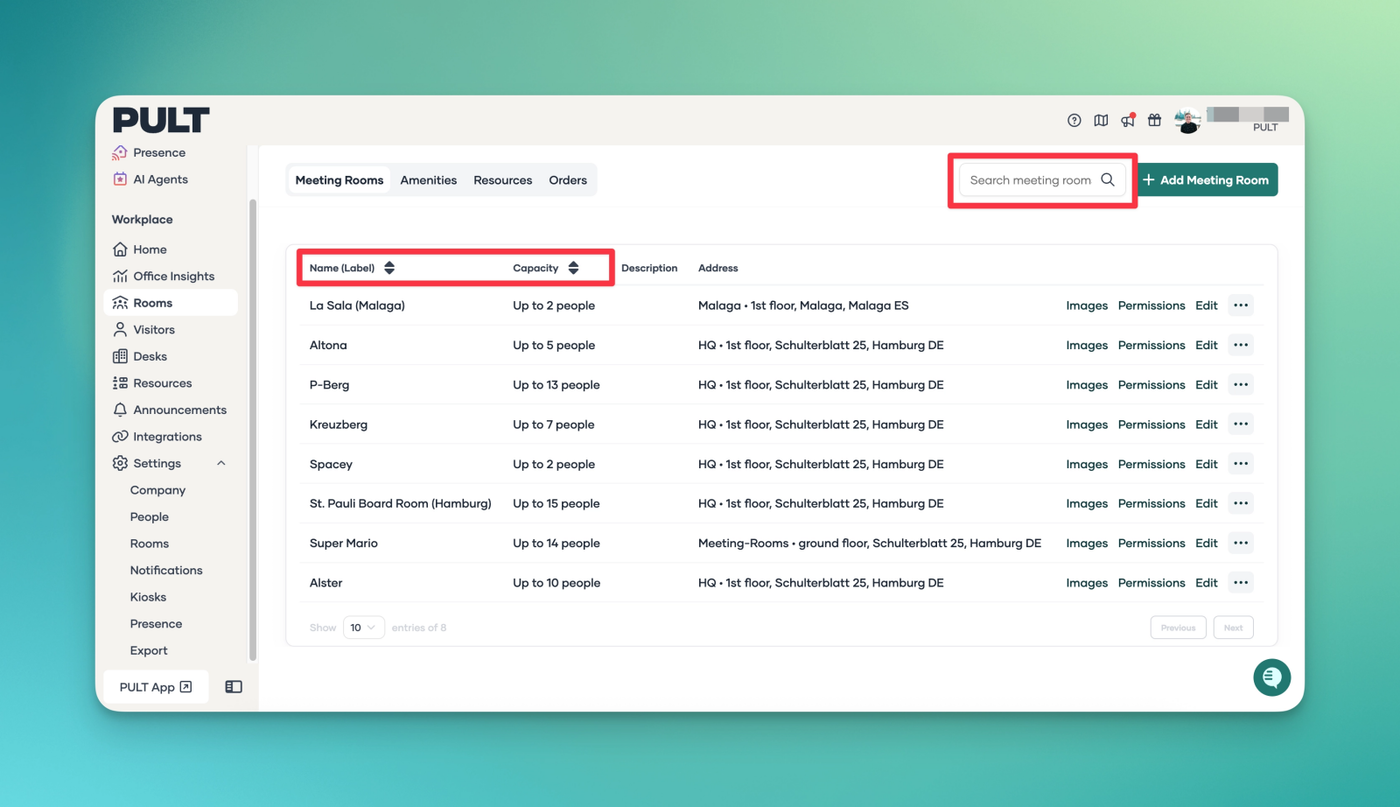
The Rooms Management Page in the Dashboard now includes a search bar and alphabetical sorting, making it easier to find the right room when you have a large number of meeting rooms.
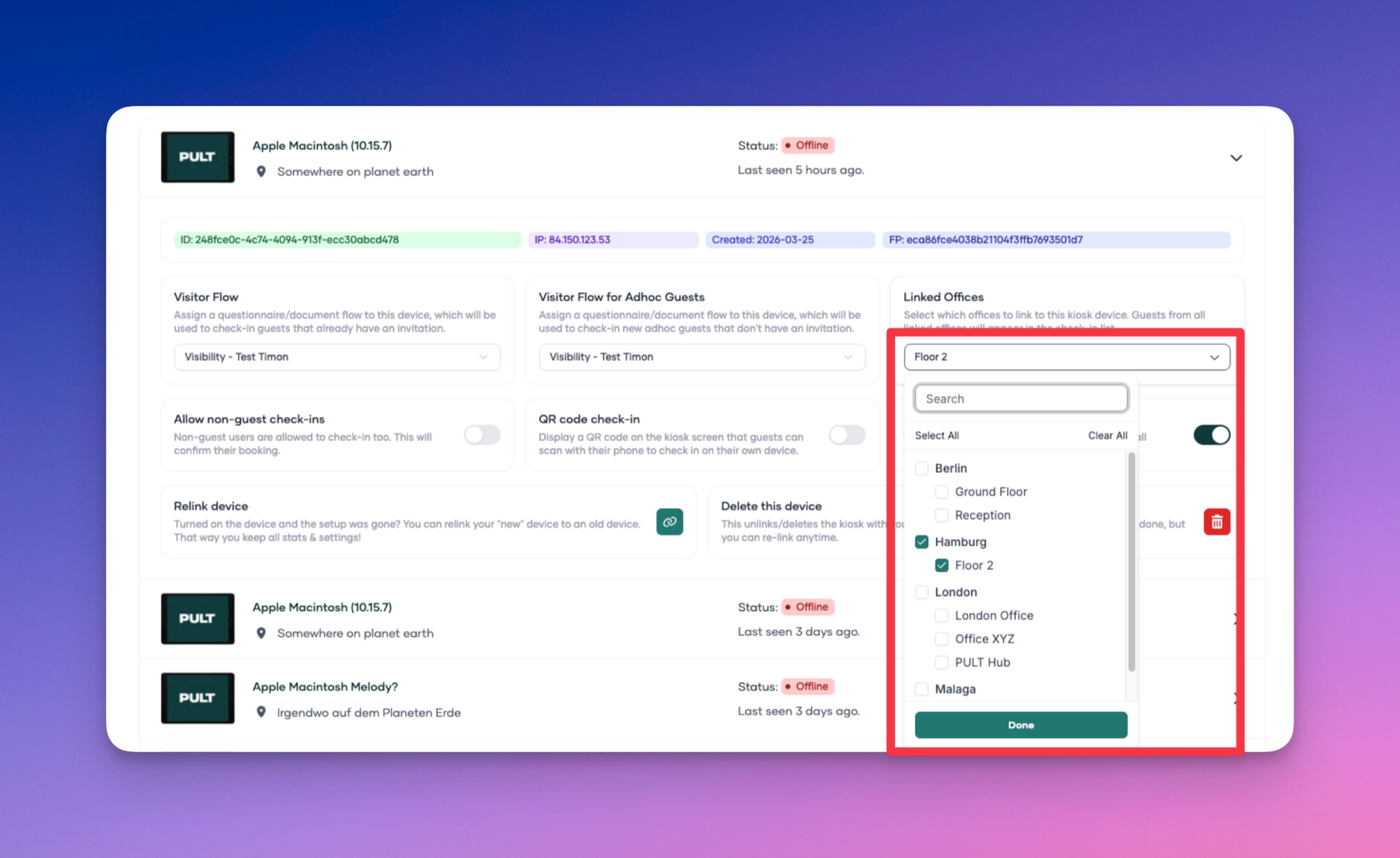
You can now assign a kiosk to multiple office locations at once, so a single check-in iPad can serve visitors across different groups or floors within the same building.
Previously, each kiosk was tied to one specific office. Visitors invited under a different office couldn't find themselves on that kiosk — even if they were physically in the same location. This made it impossible to run a single check-in point for an entire site.
With this update, you can select multiple offices when setting up a kiosk. Any visitor belonging to one of those offices will now be findable at that shared check-in point.
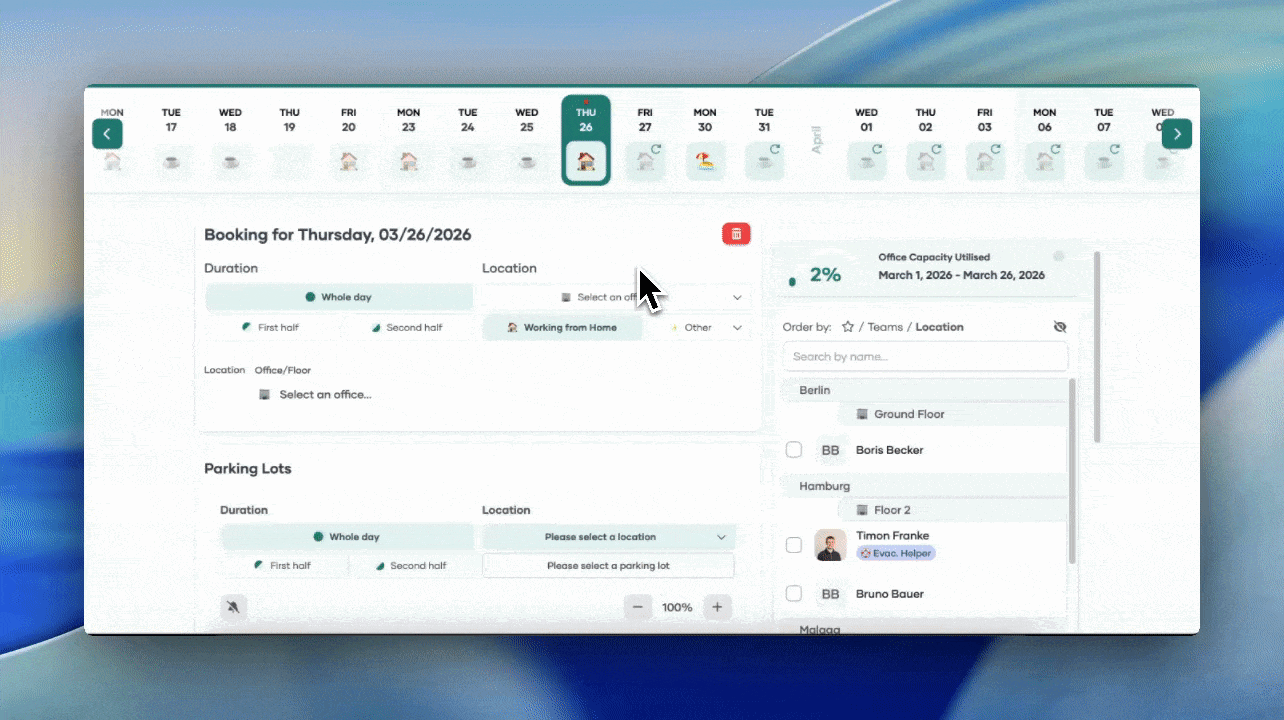
When you select an office location, the parking lot section now automatically updates to show the matching parking lot for that location — no extra steps needed.
If a match is found, the parking map loads right away. You can still override this and pick a different parking lot manually if needed. If no parking lot exists for your selected office, the section will clearly indicate that none is available.
Switching to a different office location will reset the parking selection and re-run the matching automatically.
We've shipped a major round of improvements to Visitor Management, covering everything from how visitors are invited to how they check in — plus several quality-of-life fixes for admins.
Redesigned Visitor Invite Flow
Inviting a visitor has been completely reworked. Hosts can now provide richer information when sending an invite, including:
Visitor type — choose from configurable types (e.g. Standard Visitor, Recruiting, Contractor) so the right questionnaire and flow is automatically applied to each guest.
Internal notes — add context about the visit that's only visible to admins in the Pult dashboard.
Invite on behalf of others — assistants and office managers can now invite guests on behalf of a different host by selecting them from a dropdown.
Email is optional — an email address is no longer required to make a booking. Note that as a result, desk booking for a visitor is only available when an email address is provided.
Other improvements to the invite flow:
Location Filter — Bookings can be filtered by location.
Search for past guests — a new search bar lets hosts quickly find and select previously invited visitors. Search by name, surname, email or company
Pre-fill from past visits — selecting a past guest automatically pre-fills their details, so repeat invites take just a few seconds.
Easier booking edits — existing bookings can now be edited directly, without having to cancel and recreate them.
Visitor Types
— a brand new feature that gives admins fine-grained control over the check-in experience for different kinds of visitors. Create visitor types (e.g. Standard Visitor, Contractor, Recruiting) and link specific check-in flows to each one. This is particularly powerful for scenarios like:
Serving questionnaires in different languages for international visitors
Including or excluding an NDA signing step depending on the visitor type
How it works:
Create a visitor type, then link the relevant flows to it.
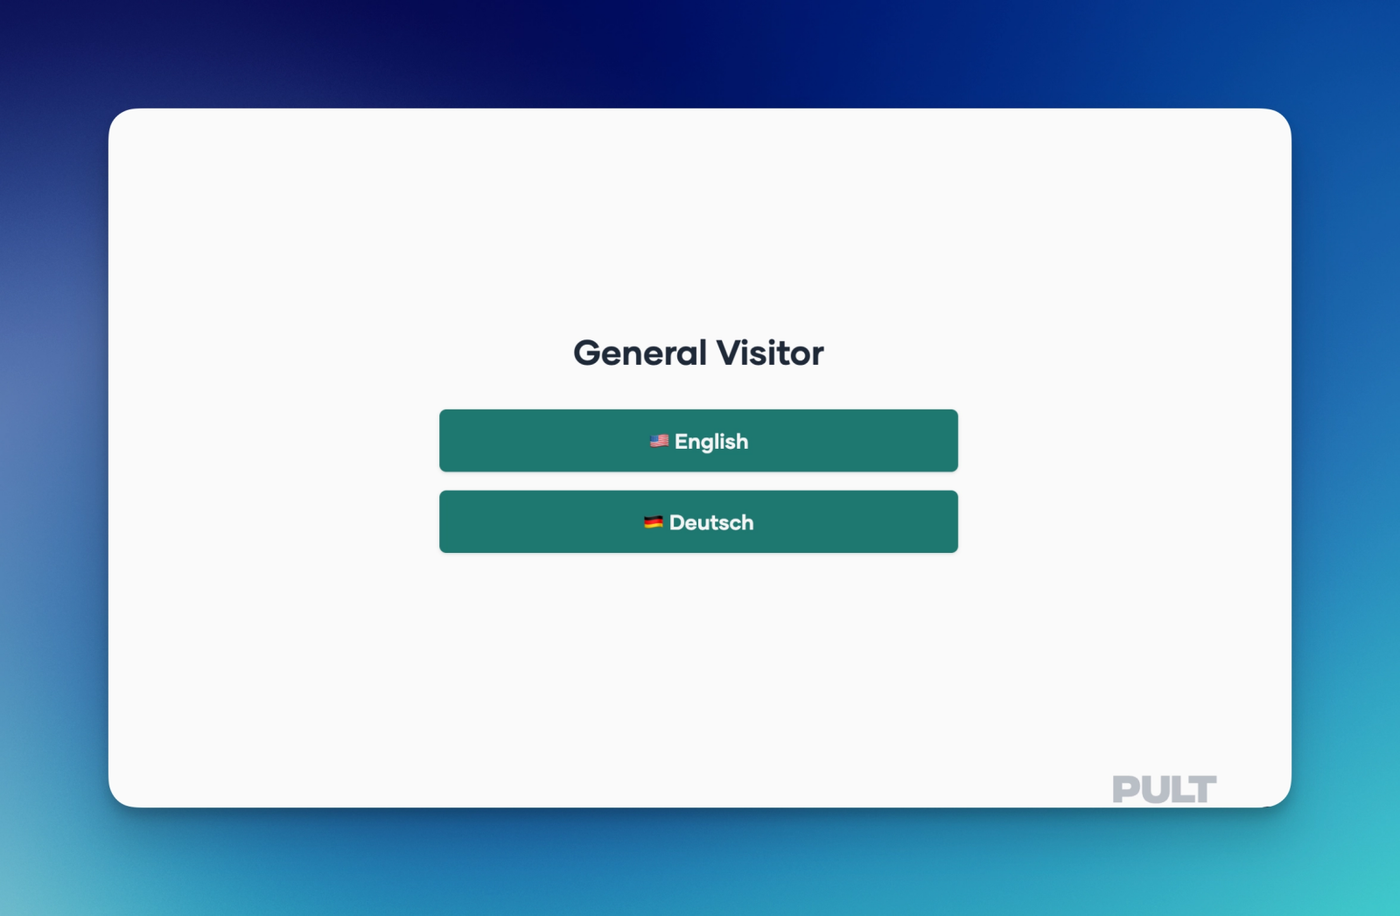
When a visitor checks in, they'll be presented with a choice of flows — and admins control what each option is called, so the labels shown to visitors are fully customisable.
This is what Visitors will see in the example of language selection:
Faster Check-In
Check-In No Longer Requires an Email
Visitors no longer need to provide an email address to check in.
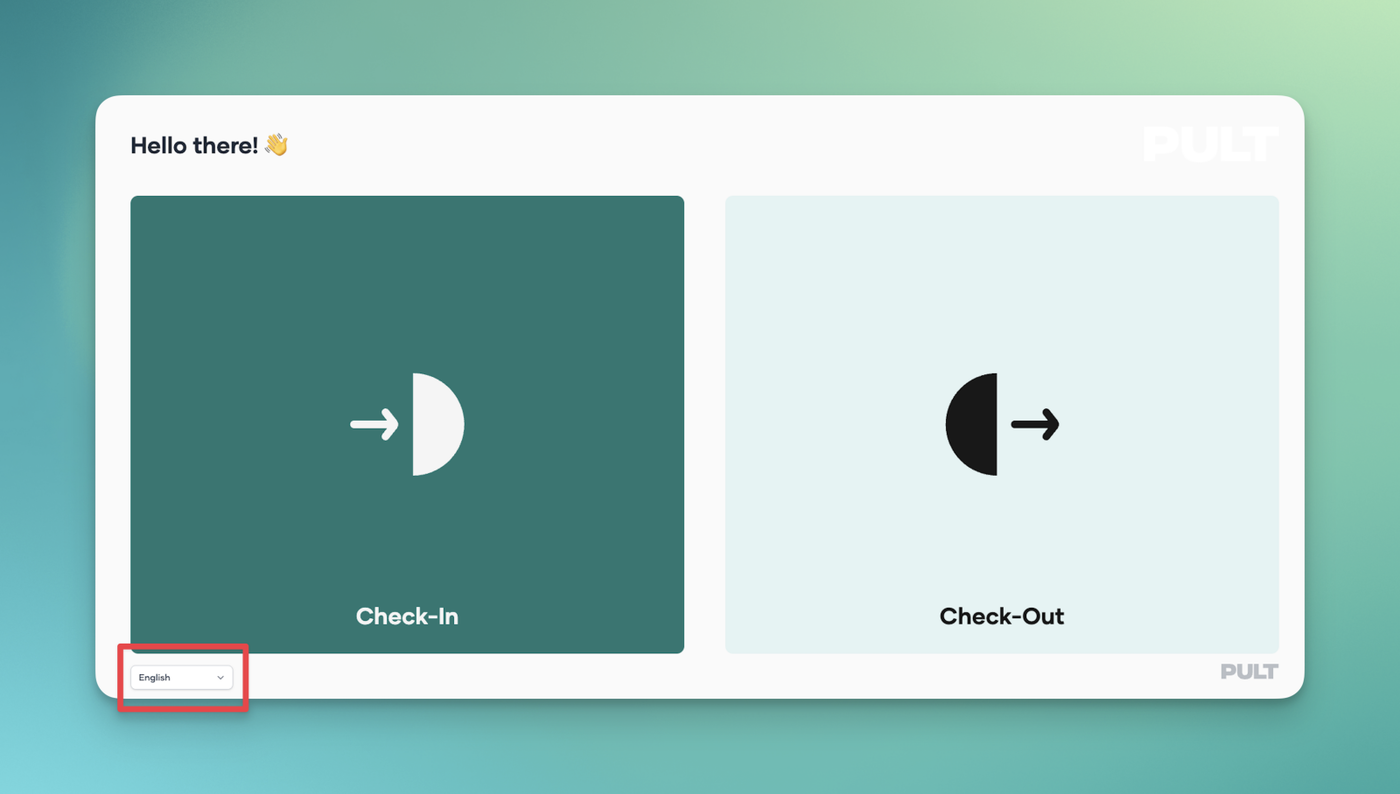
Kiosk Language Selection
Hosts and reception teams can now set their preferred language for the Kiosk check-in experience. Choose between:
🇬🇧 English
🇩🇪 German (Deutsch)
Once configured, the entire visitor-facing check-in flow — including prompts, instructions, and confirmation messages — will display in the selected language, ensuring a seamless and consistent experience for your guests
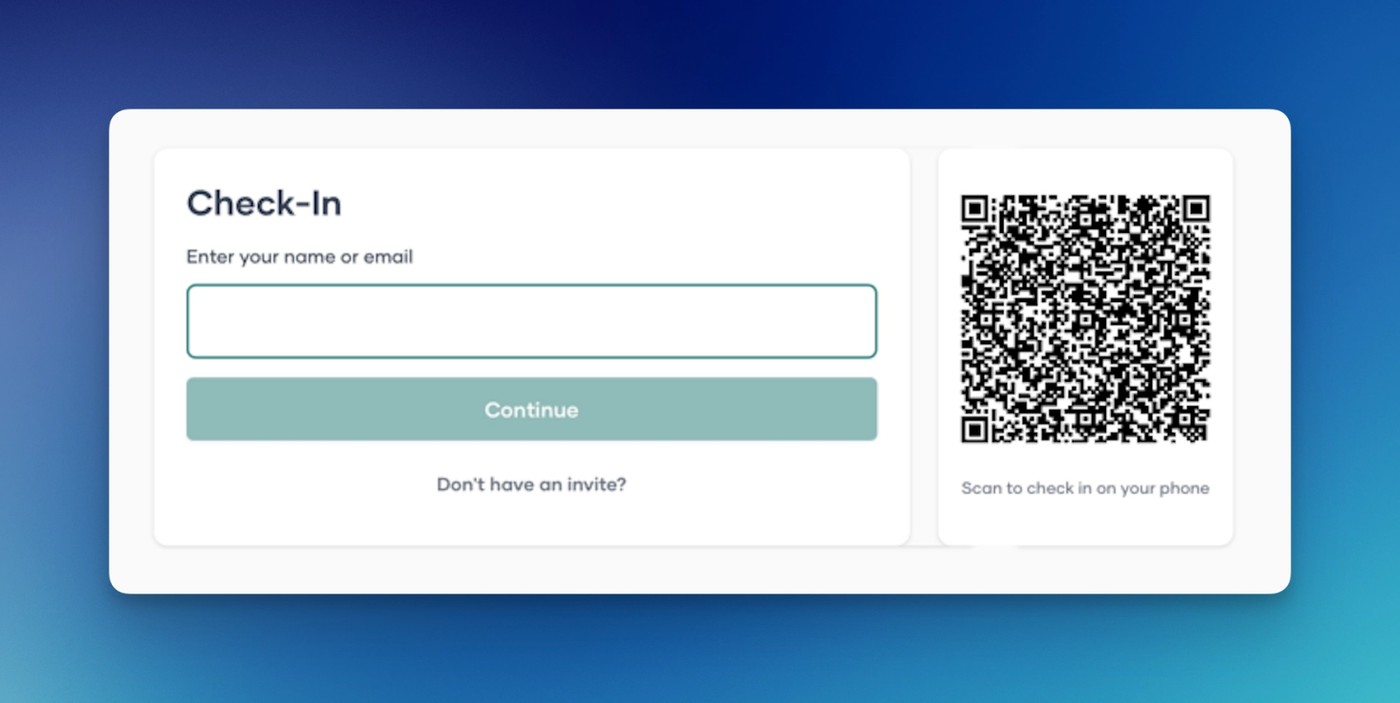
QR Code Check-In
Visitors can now be checked in via a personal QR code — a much faster option when large groups arrive at once. This can be configured by kiosk, and will not automatically be applied to all.
Admin Dashboard Updates
The Visitor Management dashboard has been refreshed with improvements for admins:
Quick invite tab — invite a guest directly from the dashboard without navigating away.
Internal notes — add and view visit notes from the dashboard view.
Have feedback on these features? Reach out to your account manager or contact our support team.
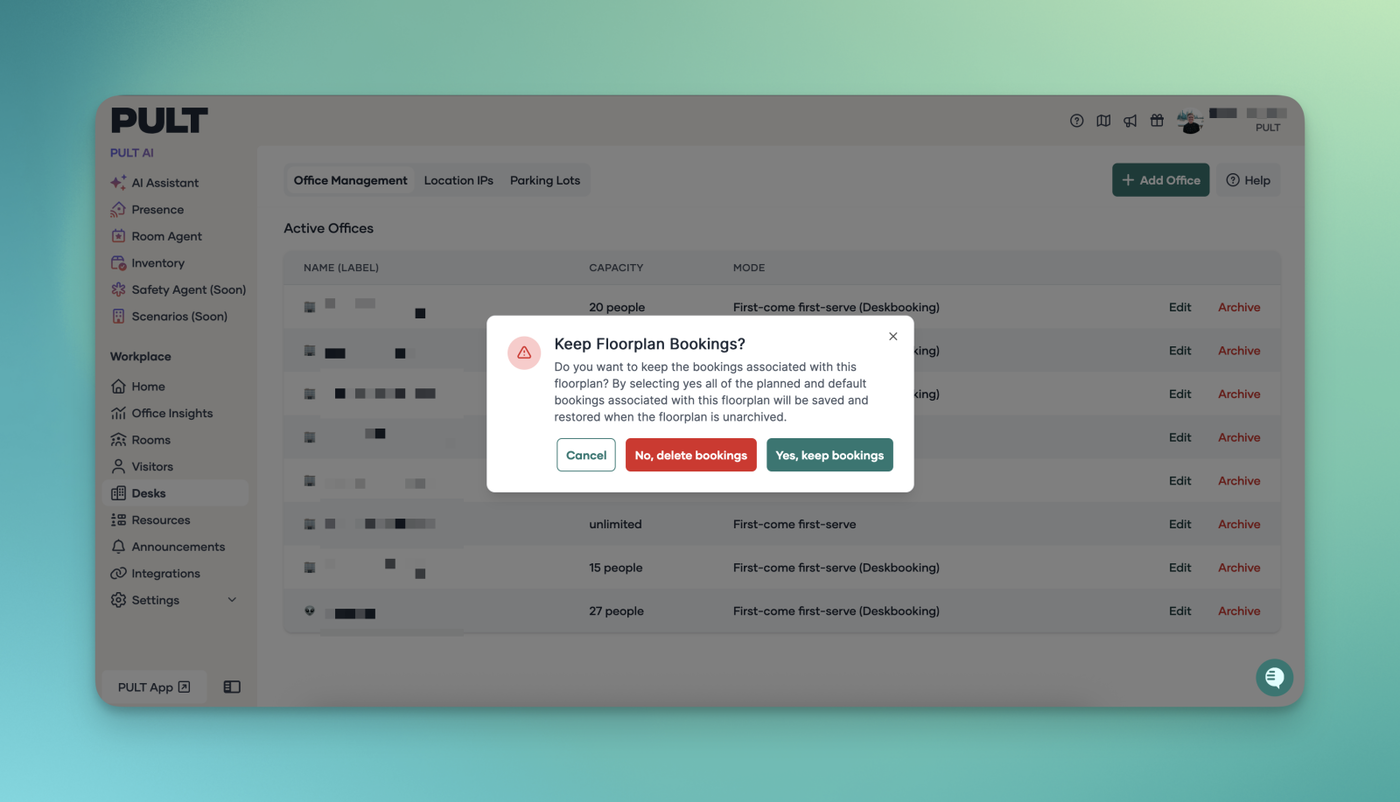
When archiving a floorplan, you now have the option to keep or delete its associated bookings. If retained, bookings will be restored automatically when the floorplan is reactivated.
A cleaner, more intuitive Presence settings page
We’ve refreshed the design of the Presence settings page to reduce clutter and improve navigation. With a simpler layout and clearer controls, managing your PULT Presence Settings is now faster and more straightforward.
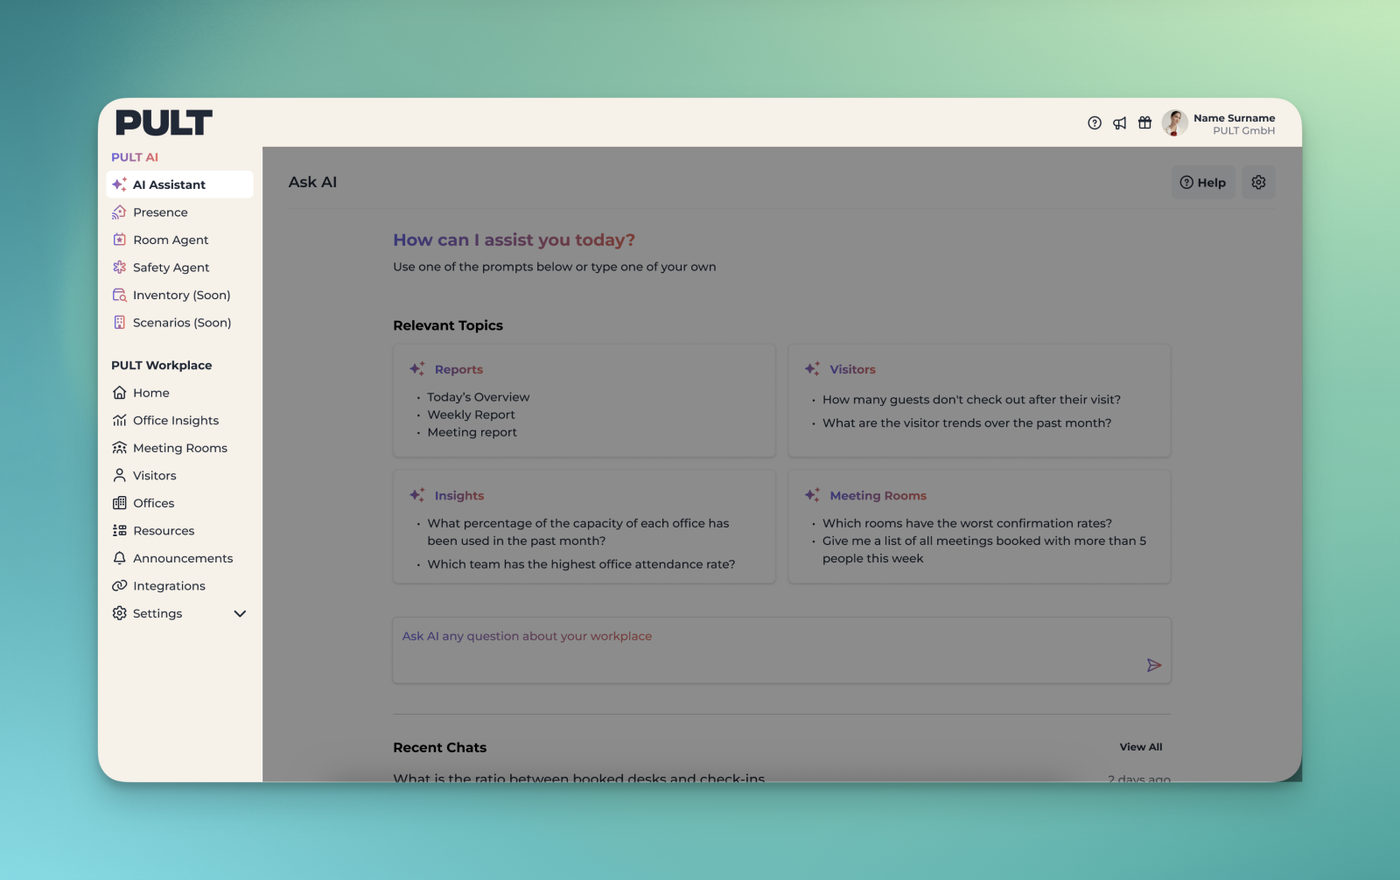
We’ve redesigned the PULT dashboard navigation to make it easier to explore what’s available today—and what’s coming next. The navigation is now organized into two clear sections:
PULT AI
A dedicated space for all PULT automation and AI-powered tools. This section highlights tools that are currently available as well as upcoming capabilities, giving you a clear view of what’s live and what’s on the roadmap.
PULT Workplace
Home to all existing tools and functionalities that power the core PULT SaaS experience. Everything you already use remains here, now grouped for easier access and clarity.
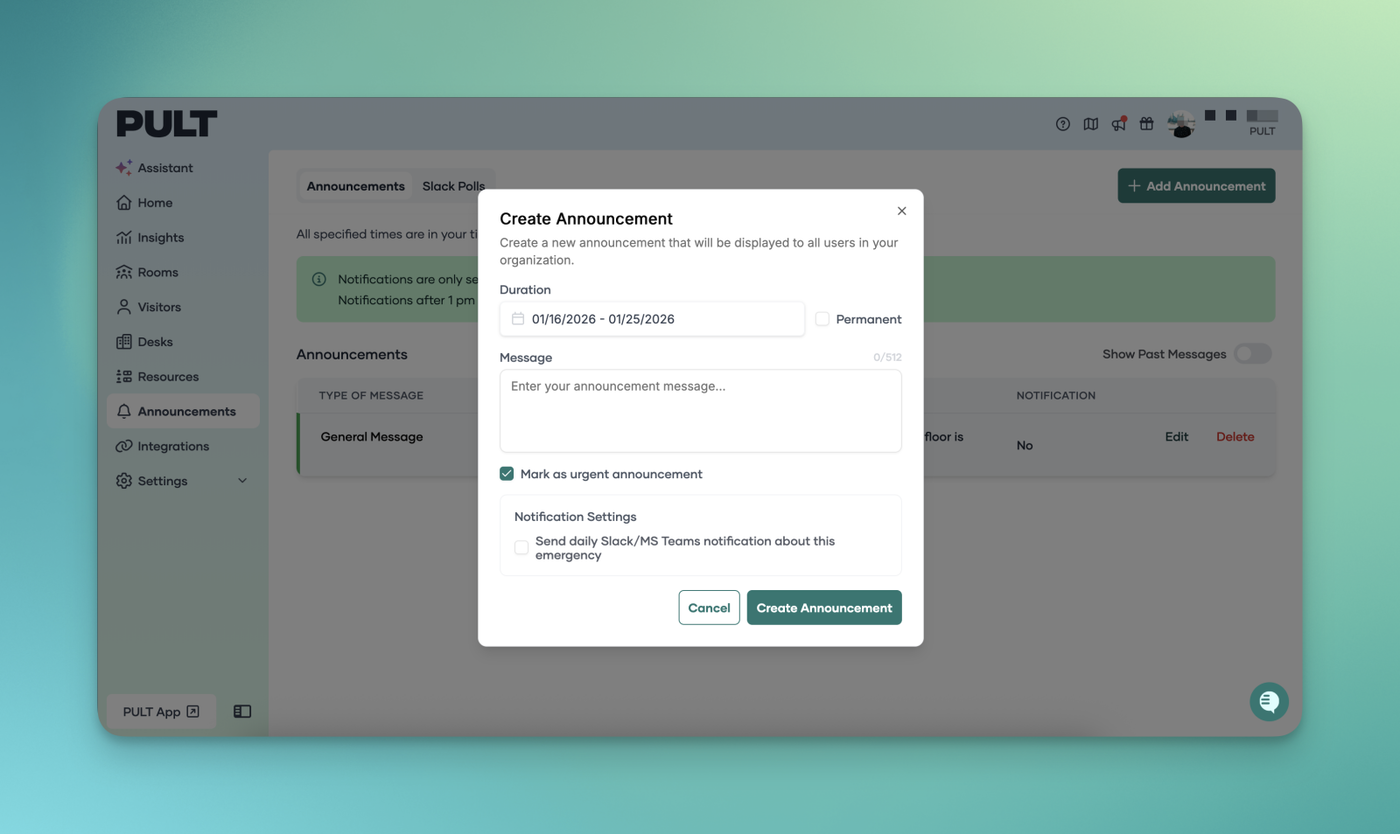
Introducing a new modal pop-up for General and Emergency Messages to improve visibility and user focus. This improves readability and accessibility across devices. Let us know what you think!
Users are no longer prompted to grant Slack permissions every time they sign in.
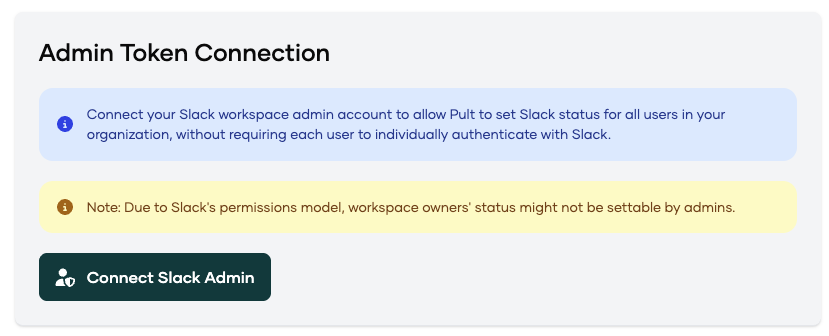
A one-time Slack authorization by an admin is now sufficient for the entire workspace.
What admins need to do (one-time setup) 1. Sign in to PULT as an admin. 2. Go to Integrations → Slack. 3. Click Connect Slack Admin to authorize the Slack app.
This installs the required permissions once per workspace.
User Status Sync
If User Status Sync is enabled, Slack statuses will automatically sync with PULT presence.
If disabled, no additional Slack permissions are required.
Result
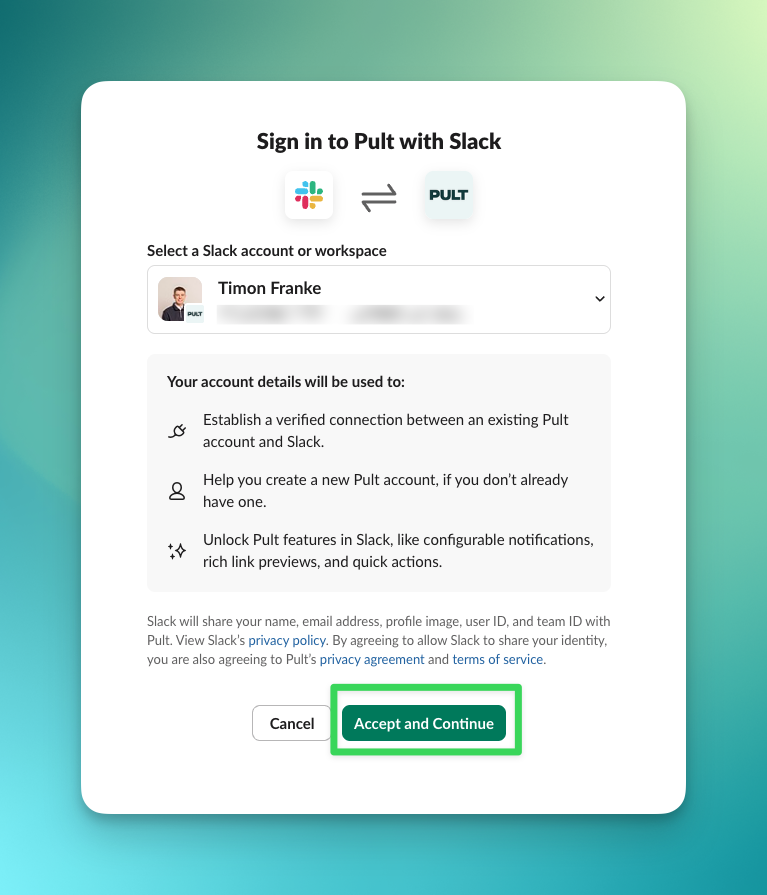
Users can sign in smoothly with Sign in with Slack.
No repeated permission prompts on subsequent logins.
Users will now see the updated Slack sign-in page.